
Proper electrode placement can mean the difference between transformative pain relief and disappointing results. Some TENS users report unsatisfactory outcomes, but it’s not because the technology doesn't work; it’s because they haven't mastered the critical science of electrode positioning.
The challenge isn't just knowing where to place electrodes; it's understanding how strategic placement works with your body's natural nerve pathways to maximize therapeutic benefits. Random pad placement might provide some temporary relief, but precise positioning based on anatomical science delivers the comprehensive pain management you're seeking.
As the only pain relief device endorsed by the American Chiropractic Association and cleared by the FDA, DR-HO'S devices incorporate our proprietary AMP 4-in-1 Technology that combines TENS, EMS, and NMES with innovative Auto-Modulating Pulses. This advanced stimulation technology works most effectively when electrodes are positioned to optimize nerve and muscle interaction—which is exactly what this comprehensive placement chart will help you achieve.
The Master TENS Pad Placement Chart
The chart below represents the most comprehensive visual guide to TENS electrode placement available, covering over 15 different pain conditions and body regions. Unlike basic placement guides that show only 3-4 common positions, this chart provides specific positioning strategies for complex pain patterns, post-surgical recovery, and chronic conditions.

How to use this chart effectively
This chart is designed as your go-to reference. Bookmark this page or print it for easy access during your pain relief sessions.
-
Target nerve pathways that carry pain signals to your brain
-
Stimulate muscle groups that support the affected area
-
Encourage healthy circulation to promote natural healing
-
Work with DR-HO'S AMP Technology for maximum therapeutic benefit
Understanding TENS Pad Placement Science
Effective electrode placement isn't random—it's based on precise anatomical science. Your body's nerve pathways follow specific routes, and strategic electrode positioning allows DR-HO'S advanced stimulation technology to work optimally with these natural systems.
Our proprietary AMP 4-in-1 Technology delivers four distinct therapeutic approaches simultaneously.
-
TENS (Transcutaneous Electrical Nerve Stimulation) sends gentle electrical impulses that help interrupt pain signals before they reach your brain.
-
EMS (Electrical Muscle Stimulation) causes targeted muscle contractions that can release tension and improve local circulation.
-
NMES (Neuromuscular Electrical Stimulation) works with specific nerve pathways to encourage healthy muscle function.
-
Auto-Modulating Pulse system continuously varies the electrical impulses, ensuring your body doesn't become accustomed to a single pattern. This helps ensure sustained effectiveness throughout your treatment and prevents the diminishing returns often experienced with conventional devices.
The placement strategies in this chart are specifically designed to optimize how these four technologies work together. When electrodes are positioned correctly, the electrical stimulation follows natural nerve pathways more effectively, encouraging better interaction between your nerves and muscles while promoting increased local circulation to the affected area.
Why proper placement matters: The human nervous system is incredibly sophisticated, with different types of nerve fibers that respond to different stimulation patterns. Strategic electrode positioning ensures that DR-HO'S advanced technology can target the appropriate nerve fibers for your specific pain condition, working with your body's natural processes rather than against them.
Learn more about how TENS machines work here.
Chart Breakdown By Condition
The following sections provide detailed electrode placement guidance for each condition shown in the comprehensive chart above. Each placement strategy is designed to work optimally with DR-HO'S AMP 4-in-1 Technology, targeting specific nerve pathways and muscle groups for maximum therapeutic benefit.
Upper body pain relief
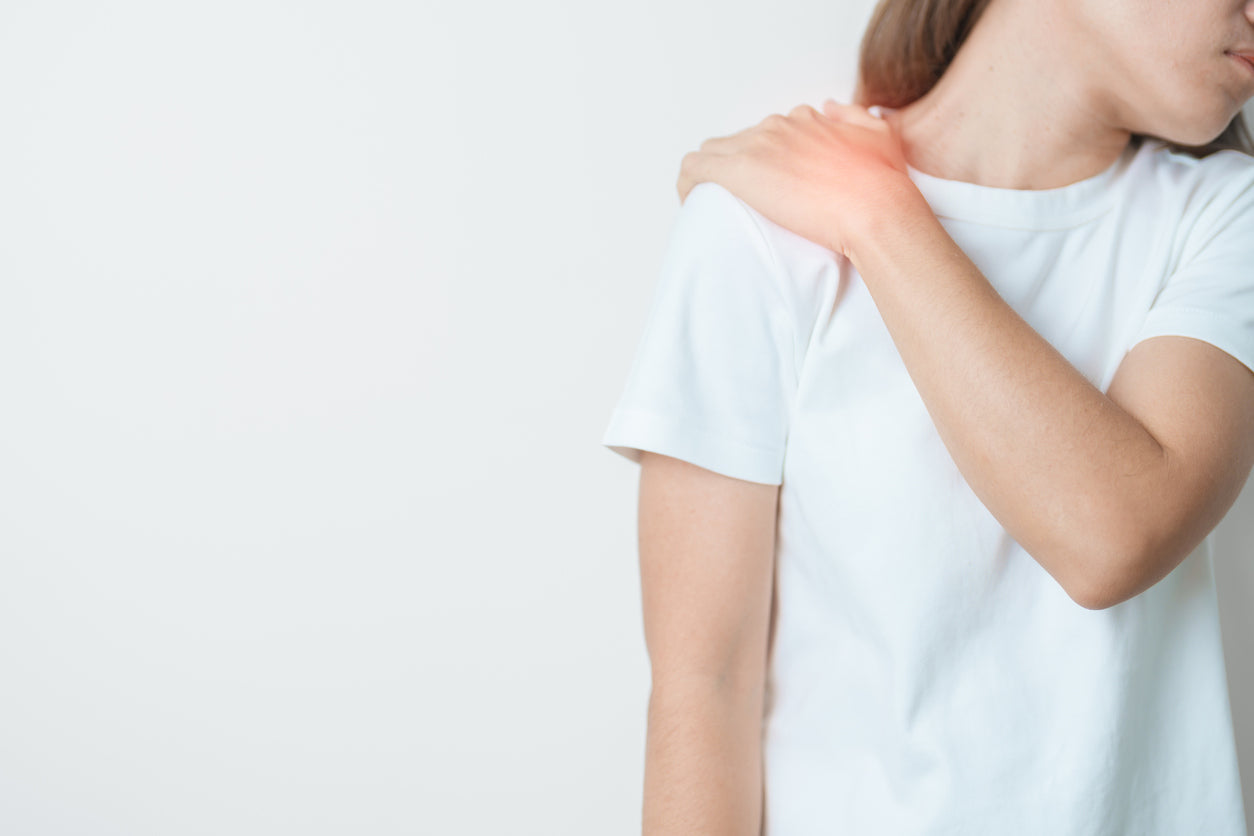
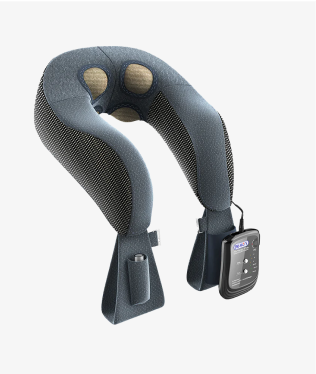
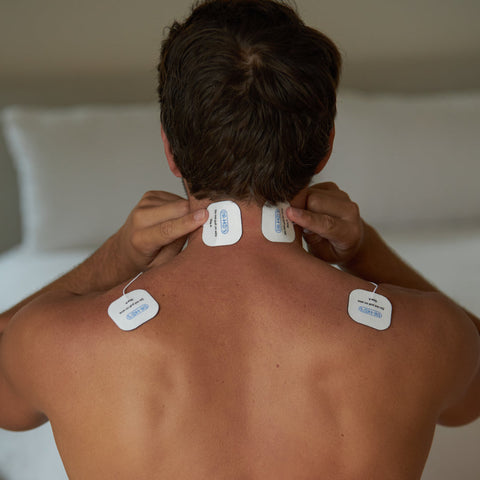
Neck and cervical pain
The cervical spine contains complex nerve pathways that require precise stimulation. Position electrodes to target both the upper trapezius muscles and the cervical nerve roots.

Electrode placement:
-
Place two electrodes at the base of the neck, one on each side
-
Position two additional electrodes on the upper shoulders
-
Ensure electrodes follow the natural curve of your neck and shoulders
This configuration allows DR-HO'S AMP Technology to address both muscle tension and nerve-related discomfort.
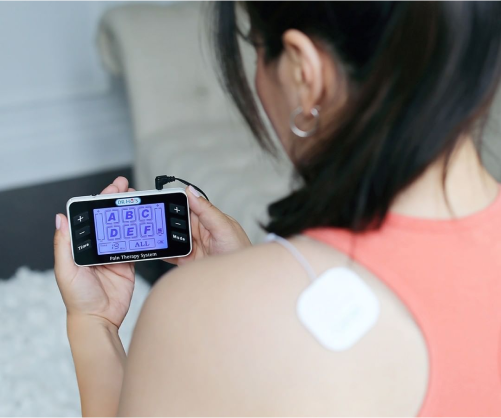
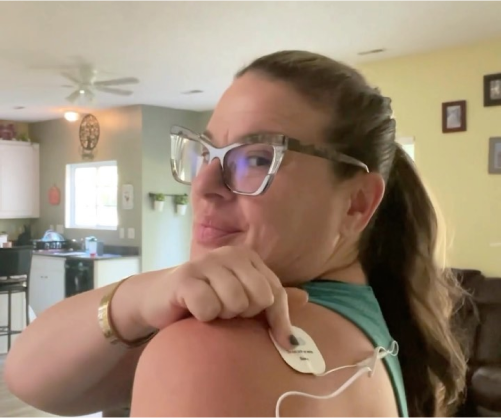
Shoulder pain (frozen shoulder, rotator cuff)
Shoulder conditions often involve multiple muscle groups and nerve pathways. The rotator cuff muscles work together to stabilize the shoulder joint, requiring comprehensive stimulation coverage.

Electrode placement:
-
Position one electrode on the front of the shoulder
-
Place the corresponding electrode on the back of the shoulder
-
For rotator cuff injuries, focus placement slightly higher to target the supraspinatus muscle
This "sandwich" approach ensures stimulation reaches the deep stabilizing muscles
Arm, elbow & wrist conditions
Conditions like tennis elbow, golfer's elbow, and carpal tunnel syndrome involve specific nerve pathways and muscle groups.

For tennis elbow:
- Place electrodes on the outer forearm, avoiding direct placement over the elbow joint
-
Position one electrode closer to the elbow, one closer to the wrist

For carpal tunnel syndrome:
-
"Sandwich" the wrist between two electrodes
-
Place one electrode on top of the wrist, one on the palm side
-
This positioning targets the median nerve pathway affected by carpal tunnel
Back & core conditions
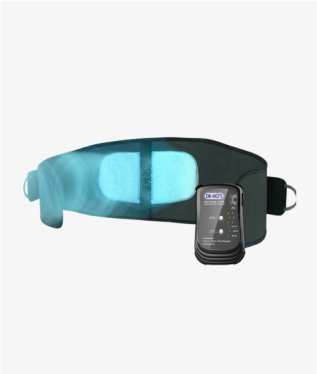
Lower back pain
Lower back pain often involves both muscular tension and nerve irritation. Effective placement targets the erector spinae muscles while addressing nerve pathways.

Bilateral treatment:
-
Use four electrodes for comprehensive coverage
-
Position two electrodes on each side of the spine at the level of discomfort
-
This approach is particularly effective for widespread lower back pain
Sciatica pain and radiating pain
Sciatica involves the sciatic nerve pathway that extends from the lower back through the buttocks and down the leg. Effective treatment requires following this nerve pathway.

Electrode placement:
-
Place two electrodes on the lower back at the origin of pain
-
Position two additional electrodes on the buttocks where the sciatic nerve emerges
-
For extensive sciatica, additional electrodes can be placed along the posterior thigh
-
This configuration allows DR-HO'S technology to address the entire affected nerve pathway
Upper & middle back pain
Thoracic spine pain often relates to postural stress and intercostal muscle tension.

Electrode placement:
-
Position electrodes parallel to the spine at the level of discomfort
-
Avoid direct placement over the spine or bony prominences
Lower body applications
Hip pain
Hip pain can originate from joint issues, muscle imbalances, or referred pain from the lower back. Comprehensive treatment addresses multiple potential sources.

Electrode placement:
-
Position one electrode on the front of the hip joint
-
Place the corresponding electrode on the back of the hip
-
For greater trochanter pain, focus placement on the outer hip region
This positioning targets both the hip flexors and the deep stabilizing muscles
Knee pain
Knee pain often involves the surrounding muscle groups that provide joint stability. Effective placement targets these supporting structures.

The "sandwich" technique:
-
Place one large electrode pad on the inner (medial) side of your knee, approximately 2-3 inches above and below the joint line
-
Place the corresponding large pad on the outer (lateral) side of your knee, mirroring the first pad's position
-
Ensure the pads are positioned so they don't touch each other, with at least one inch of space between them
-
Avoid the kneecap: Never place electrodes directly over the patella (kneecap) bone, as this can cause discomfort and reduce effectiveness
Post-surgical recovery:
-
Modify placement to avoid incision sites
-
Focus on surrounding muscle groups that support knee function
-
Consult with your healthcare provider for specific post-surgical guidelines
Leg, calf, and foot conditions

For calf pain or cramps:
-
Place electrodes vertically on either side of the calf muscle
-
Ensure at least one inch separation between electrodes
-
This positioning targets the gastrocnemius and soleus muscles

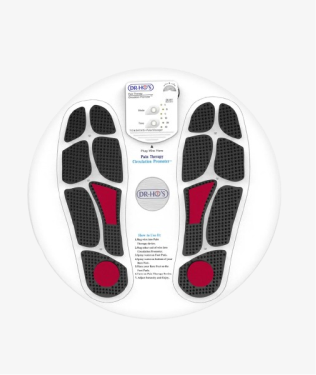
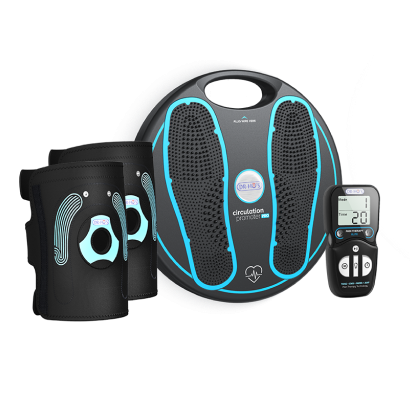
For plantar fasciitis:
-
DR-HO'S Circulation Promoter base plate is specifically designed for foot conditions
-
The specialized design targets the complex nerve pathways in the feet
-
This approach is particularly effective for circulation-related foot pain

For shin splints:
-
Position electrodes along the affected area of the shin
-
Place electrodes vertically with appropriate spacing
-
Focus on the tibialis anterior muscle group
Specialized applications
Post-surgical recovery
Post-surgical electrode placement requires special consideration to avoid compromising healing while providing effective pain relief.
General guidelines:
-
Never place electrodes directly over incision sites
-
Focus on surrounding muscle groups that support the surgical area
-
Use lower intensity settings initially and increase gradually as healing progresses
-
Always follow your surgeon's specific guidelines for post-operative care
Chronic conditions (fibromyalgia, arthritis)
Chronic pain conditions often require comprehensive treatment approaches that address multiple pain points simultaneously.
Multi-point strategy:
-
Use DR-HO'S dual-channel technology to treat multiple areas concurrently
-
Rotate electrode placement between sessions to prevent adaptation
-
Focus on areas where pain is most prominent while addressing secondary pain points
-
The auto-modulating technology is particularly beneficial for chronic conditions
Sports injuries
Sports-related injuries often involve specific movement patterns and muscle groups. Treatment should address both the injury site and compensatory patterns.
Acute phase:
-
Focus on the specific injured area with appropriate electrode placement
-
Use lower intensity settings during the initial inflammatory phase
-
Follow the RICE protocol (Rest, Ice, Compression, Elevation) in conjunction with TENS therapy
Recovery phase:
-
Expand electrode placement to include supporting muscle groups
-
Address compensatory movement patterns that may develop
-
Use higher intensity settings as tissue healing progresses
Optimizing Pad Placement For Different Pain Types
Different types of pain respond better to specific placement strategies. Understanding these differences helps you customize your approach.
-
Acute pain: Focus electrode placement directly around the affected area to provide immediate relief. Use the bracketing method when possible.
-
Chronic pain: Broader electrode placement that addresses secondary pain points and compensatory patterns often provides better long-term results.
-
Nerve pain: Follow known nerve pathways with electrode placement. The linear approach is often most effective for conditions like sciatica.
-
Muscle pain: Target specific muscle groups with electrode placement that encourages healthy muscle contraction and relaxation.
Best Practices For Using Your TENS Machine
To get the most benefit from your DR-HO'S device, always follow these guidelines:
-
Preparation: Always start with clean, dry skin. A quick wash with mild soap and water helps ensure your electrodes make good contact and stay in place throughout your session.
-
Electrode maintenance: Check your electrodes before each use. They should feel sticky and adhere well to your skin. You can spray the pads with water before and after each use to maintain their adhesive quality.
-
Starting your session: Begin with your device turned off when placing or adjusting electrodes. Once properly positioned, start with the lowest intensity setting and gradually increase to a comfortable level.
-
Session duration: Start with shorter sessions of 15-20 minutes. You can gradually find the duration that works best for your specific needs.
-
Frequency: You can use your DR-HO'S device daily as part of your wellness routine. Many users find that strategic timing throughout the day provides optimal relief:
-
Morning sessions: Start your day right by addressing any stiffness or discomfort that developed overnight
-
Throughout the day: Take short breaks to manage discomfort before it builds up
-
Evening relief: End your day with a session to help your muscles relax and recover
-
After your session: Always turn off your device before removing electrodes. Store them on the provided protective film to maintain their stickiness between uses.
Safety Considerations
While your DR-HO'S device is FDA-cleared and designed with your safety in mind, it's important to follow these precautions:
Areas to avoid:
-
Eyes or surrounding area
-
Mouth
-
Front of the neck
-
Irritated or broken skin or wounds
-
Any areas with tumors
-
Directly over the spinal column
Special considerations:
-
Do not use while pregnant
-
If you have cardiac concerns, consult your healthcare provider before use
-
Do not use with a pacemaker or similar device
-
Always remove jewelry or metal objects from the area where you'll be placing electrodes
When to seek medical advice:
If pain persists, worsens, or is accompanied by other concerning symptoms (e.g., swelling, redness, fever, or numbness), consult a healthcare provider to identify and address the underlying cause.
Troubleshooting Other TENS Pad Placement Issues
Even with proper guidance, you may occasionally encounter challenges with your TENS therapy. The following solutions address the most frequently reported issues and will help you optimize your electrode placement for consistent, effective pain relief.
"I don't feel anything"
When you can't feel the stimulation, the issue is usually related to electrode contact or device settings rather than placement location.
Solutions:
-
Ensure electrodes have good skin contact by lightly moistening them
-
Check that your skin is clean and dry before electrode application
-
Gradually increase intensity—you may need a higher setting than expected
-
Verify that electrodes haven't lost their adhesive quality
-
Confirm your device is fully charged (for rechargeable device) or the batteries are new
"The sensation is uncomfortable"
Discomfort during treatment usually indicates either incorrect intensity levels or suboptimal electrode placement.
Adjustment strategies:
-
Immediately reduce intensity to a comfortable level
-
Slightly reposition electrodes—even small adjustments can significantly improve comfort
-
Ensure adequate spacing between electrodes (minimum one inch)
-
Check that you're not placing electrodes over bony prominences
-
Verify that electrodes are making even contact with your skin
"It worked before, but not now"
Reduced effectiveness over time can result from several factors, most of which are easily correctable.
Solutions:
-
Rotate electrode placement slightly to target different nerve pathways
-
Increase intensity gradually—your body may have adapted to previous levels
-
Check electrode condition and replace if adhesion has decreased
-
Try extending session duration or increasing frequency
-
Consider using different electrode placement patterns from this chart
“My skin is irritated”
Occasional skin sensitivity can develop with regular use, but proper electrode care usually prevents problems.
Prevention and treatment:
-
Ensure electrodes are clean and properly moistened before use
-
Allow skin to rest between sessions if irritation develops
-
Never exceed recommended session durations
-
Clean the treatment area gently after each session
Conclusion and Next Steps
This comprehensive TENS placement chart represents your complete visual guide to effective pain relief with DR-HO'S advanced stimulation technology. By understanding the science behind strategic electrode positioning and following the specific placement guidelines for your condition, you're equipped to maximize the therapeutic benefits of our proprietary AMP 4-in-1 Technology.
Remember that effective pain management is a journey, not a destination. While this chart provides the foundation for optimal electrode placement, your individual response may require slight adjustments to achieve the best results. The sophisticated auto-modulating technology in DR-HO'S devices works with your body's natural healing processes, but strategic electrode placement ensures you're harnessing the full potential of this advanced therapy.
Your next steps:
-
Bookmark this page or save the chart for easy reference during your pain relief sessions
-
Start with the specific placement recommendations for your primary pain condition
-
Begin with conservative settings and adjust based on your comfort and response
-
Track what works for your unique pain patterns and lifestyle needs
-
Consult the troubleshooting section if you encounter any challenges
The combination of this comprehensive placement guide and DR-HO'S FDA-cleared, ACA-endorsed technology provides you with a complete system for effective, at-home pain management. Whether you're dealing with chronic conditions, recovering from injury, or managing daily activity-related discomfort, proper electrode placement is your key to transformative pain relief.
For additional support, device-specific guidance, or questions about optimizing your DR-HO'S technology for your unique needs, our customer care team stands ready to help you achieve the pain-free lifestyle you deserve.
Disclaimer: DR-HO'S content is intended for informational purposes only and should not be taken as medical advice. Please consult a certified medical professional for diagnosis and treatment recommendations.